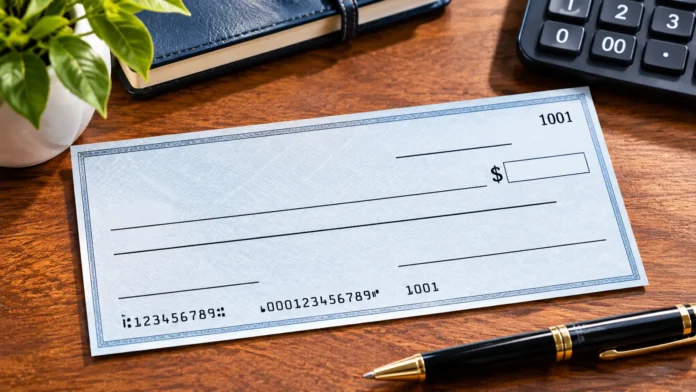

A personal check contains several important sections that help banks identify accounts, confirm payment amounts, and process transactions correctly. Understanding the parts of a check makes it easier to write payments, read banking information, and avoid common mistakes. Each section has a specific purpose, from the date and payee name to the routing number and signature.
Although digital payments are increasingly common, paper checks are still used for rent, bills, business transactions, and certain personal payments. Learning how to identify the different parts of a check can make traditional banking easier to understand. This guide explains each section of a standard U.S. check, where to find it, and why it matters.
What Are the Main Parts of a Check?
A check is a written payment instruction that directs a bank or credit union to pay money from an account. Standard personal checks contain several printed and handwritten fields that support payment processing. Understanding these sections helps account holders complete checks correctly and allows recipients to recognize important payment information.
The main parts of a check include the date, payee line, numerical amount box, written amount line, memo line, and signature line. Printed information usually includes the account holder’s name, bank details, routing number, account number, and check number. Each component performs a different function during payment preparation or processing.
Some check designs look different because banks and financial institutions use their own layouts. However, most standard U.S. personal checks contain similar essential information. Identifying these details can help prevent mistakes, especially when writing a check for the first time or reviewing a payment received from someone else.
Parts of a Check Labeled: Understanding the Layout
A labeled check guide helps explain where important information appears on a typical personal check. The account holder’s name and address are often printed near the upper-left corner, while the date appears toward the upper right. The payee, amount, memo, and signature fields are arranged across the main body.
The bottom edge contains a special line of printed numbers used during banking transactions. These numbers generally include the routing number, account number, and check number. Their exact arrangement can vary between financial institutions, so identifying each number by its position alone is not always sufficient.
The following table provides a simple labeled breakdown of the main components found on a standard U.S. check. It explains the typical location and purpose of each section. Actual layouts may vary, so account holders should refer to their bank’s instructions when identifying unfamiliar information.
| Check Part | Typical Location | Purpose |
|---|---|---|
| Account holder’s name | Upper left | Identifies the account owner |
| Bank name | Usually upper area | Identifies the financial institution |
| Check number | Upper right and bottom | Tracks individual checks |
| Date line | Upper right | Records the check date |
| Payee line | Center-left | Names the payment recipient |
| Amount box | Right side | Shows payment in numbers |
| Written amount line | Below payee | Shows payment in words |
| Memo line | Lower left | Records payment details |
| Signature line | Lower right | Authorizes the payment |
| Routing number | Bottom MICR line | Identifies the financial institution |
| Account number | Bottom MICR line | Identifies the bank account |
Date Line: When the Check Is Written
The date line is usually located near the upper-right corner of a personal check. It records the date associated with the payment instruction. The person writing the check generally enters the month, day, and year using a format accepted by the financial institution.
Dating a check correctly helps maintain accurate financial records and provides useful information for the recipient. For example, someone reviewing rent payments or business expenses may use the date to organize transactions. However, the date written on a check does not necessarily determine when the bank will process the payment.
A postdated check contains a future date, but writing a future date does not always prevent earlier processing. Bank policies and applicable laws influence how these payments are handled. If you need a payment to occur at a particular time, confirm the appropriate arrangements with your financial institution rather than relying only on the date.
Payee Line: Who Receives the Money?
The payee line identifies the person or organization intended to receive the payment. It is commonly labeled “Pay to the Order of” and appears toward the center-left portion of the check. The check writer enters the recipient’s name clearly to help the financial institution recognize who should receive the funds.
When paying an individual, use their appropriate name rather than an informal nickname whenever possible. For business payments, enter the organization’s correct legal or accepted payment name. Accurate payee information can reduce processing difficulties and help prevent confusion when the check is deposited.
Some checks are written to “Cash” instead of naming a specific person or business. However, this practice can increase risk because the check may be easier for an unintended person to negotiate if it is lost. Naming the intended recipient is generally a safer approach for ordinary payments.
Numerical Amount Box: Writing the Payment in Numbers
The numerical amount box is usually located on the right side of a personal check. It typically appears near a printed dollar sign and is used to show the payment amount in figures. For example, a payment of seventy-five dollars and fifty cents would be entered as $75.50.
Writing the amount clearly is important because unclear numbers can create processing problems. Include the decimal point and cents when necessary, even if the amount involves whole dollars. For example, writing 75.00 makes the intended amount easier to understand than leaving the cents unspecified.
Avoid leaving large spaces before or after the numerical amount because they may create opportunities for unauthorized changes. Write the figures neatly and verify them before signing the check. The numerical amount should agree with the amount written in words elsewhere on the document.
Written Amount Line: Expressing the Amount in Words
The written amount line appears below the payee section and provides a second representation of the payment amount. Instead of entering figures, the writer spells out the dollar amount using words. This helps clarify the intended payment when the numerical amount is difficult to read or contains an error.
For example, a check for $125.50 might display “One hundred twenty-five and 50/100 dollars” on the written amount line. Cents are commonly expressed as a fraction of one hundred. The exact wording can vary, but the meaning should remain clear and consistent with the numerical amount.
If the written and numerical amounts disagree, banking rules may give priority to the amount expressed in words, although handling can depend on the circumstances. The safest approach is to ensure both amounts match before submitting the check. Drawing a line through unused space can also help discourage unauthorized additions.
Memo Line: Explaining the Purpose of Payment
The memo line is generally located near the lower-left portion of a personal check. It provides an optional space for recording the reason for the payment. Common examples include rent, tuition, invoice numbers, membership fees, or other details that help identify a transaction.
Although the memo line is usually not required for an ordinary check to be processed, it can improve recordkeeping. Businesses may request that customers include an account or invoice reference. This information can help recipients match incoming payments with the correct billing records.
Avoid writing unnecessary sensitive information on the memo line. Checks may be handled, photographed, or stored by multiple parties during processing and recordkeeping. Use only the details reasonably needed to identify the payment, and follow the recipient’s instructions when a specific reference is required.
Signature Line: Authorizing the Check
The signature line usually appears near the lower-right corner of a personal check. The account holder signs this section to authorize the payment instruction. Without an appropriate signature, the check may be rejected or require additional verification before the financial institution processes it.
A signature is an important security feature because it connects the payment instruction to the authorized account holder. Financial institutions may use signature information as part of their verification procedures. However, signatures are not the only protection against unauthorized transactions, and banks use additional security controls.
Never sign a blank check that has not been completed with the intended recipient and payment amount. Doing so can create a serious risk if someone gains access to it. Review all payment information before signing, then keep unused checks in a secure location.
Routing Number: Identifying the Bank
The routing number is a nine-digit number used to identify a U.S. financial institution during certain payment transactions. It commonly appears near the lower-left portion of a check, within the machine-readable number line. Banks use routing information to direct payments through appropriate financial networks.
Routing numbers are used for several banking activities, including check processing and certain electronic transfers. However, a financial institution may use different routing numbers for different transaction types or geographic areas. Therefore, the routing number printed on a check may not always be suitable for every type of transfer.
When setting up direct deposits or electronic payments, confirm the correct routing information with your bank. Do not assume that every number printed near the bottom of a check serves the same purpose. Understanding the routing number’s function helps reduce payment errors and supports more accurate banking arrangements.
Account Number: Identifying the Checking Account
The account number identifies the specific checking account associated with the payment. It appears within the number sequence printed along the bottom of the check. Unlike the routing number, which identifies a financial institution, the account number identifies the particular account from which funds may be withdrawn.
Account number lengths vary depending on the bank or credit union. The number may appear after the routing number, although exact placement differs between check designs. Account holders should use their financial institution’s official guidance when distinguishing the account number from surrounding printed information.
A checking account number is sensitive financial information and should be handled carefully. Avoid posting photographs of checks online or sharing account details with unfamiliar individuals. When providing information for legitimate payments, use secure channels and verify that the recipient has a valid reason to request it.
Check Number: Tracking Individual Payments
The check number is a unique reference assigned to an individual check within a checkbook or payment series. It usually appears near the upper-right corner and may also be printed in the bottom number line. Sequential numbering helps account holders identify specific checks when reviewing their banking records.
Check numbers can be useful when tracking rent payments, invoices, and other financial transactions. For example, recording the check number alongside the payment date and amount makes reconciliation easier. This information may also help when contacting a bank about a missing or disputed check.
The check number does not determine the payment amount or authorize the transaction by itself. It primarily serves as an identification and recordkeeping tool. When reviewing a bank statement, matching check numbers with personal records can help confirm which payments have been processed.
MICR Line: Understanding the Numbers at the Bottom
The MICR line is the sequence of special characters and numbers printed along the bottom edge of many checks. MICR stands for Magnetic Ink Character Recognition, a technology used to support automated check processing. The line typically contains routing, account, and check number information.
Specially designed characters allow compatible equipment to recognize the information accurately. Traditionally, magnetic ink helps machines process checks, although modern systems may also use electronic images and other technologies. This standardized information supports efficient handling of large numbers of payments within the banking system.
Do not write over, damage, or obscure the MICR line when completing a check. Marks in this area may interfere with automated reading or create additional processing requirements. If the printed information is damaged or unclear, contact your bank for guidance rather than attempting to repair the characters yourself.
Endorsement Area: Signing the Back of a Check
The endorsement area is located on the back of a check and is commonly used by the recipient when depositing or negotiating the payment. Many checks have a designated endorsement section with printed instructions. The required endorsement depends on the bank, deposit method, and type of transaction.
A blank endorsement generally involves signing the back of the check. A restrictive endorsement may include wording such as “For Deposit Only,” sometimes followed by additional details required by the receiving institution. Mobile deposits may have specific endorsement requirements that must be followed for successful processing.
Recipients should avoid endorsing a check unnecessarily before they are ready to deposit it. A signed check may be more vulnerable if it is lost or handled improperly. Always follow your financial institution’s deposit instructions and confirm whether additional wording is needed for mobile or business deposits.
How to Fill Out a Check Correctly
Filling out a check begins with entering the correct date and identifying the intended recipient. Write the payee’s name clearly on the appropriate line. Next, enter the payment amount in the numerical box, making sure the figures accurately represent the amount you intend to pay.
Write the same amount in words on the designated line, including the cents when applicable. If the recipient requests an invoice or account reference, add it to the memo field. Review the information carefully to ensure the payee and both payment amounts are accurate.
Finally, sign the check using your authorized signature. Record the transaction in your check register or personal financial records, including the amount, recipient, and check number. Keeping accurate records helps you monitor your account balance and identify transactions that have not yet cleared.
Common Mistakes to Avoid When Writing Checks
One common mistake is writing different amounts in the numerical box and written amount line. This inconsistency can cause confusion and may result in processing problems. Always compare both sections before signing to ensure that the intended payment is clearly stated.
Another mistake is leaving important fields incomplete. Missing payee information, unclear amounts, or an absent signature may prevent a check from being processed properly. Using a pen with permanent ink and writing neatly can help reduce opportunities for accidental errors or unauthorized alterations.
Account holders should also avoid using checks without confirming that sufficient funds are available. A check that exceeds the available balance may be returned, potentially resulting in fees or other consequences. Reviewing your balance and outstanding payments helps support responsible account management.
How to Keep Your Checks and Banking Information Safe
Check security begins with protecting unused checkbooks and limiting access to sensitive financial information. Store checks in a secure location and avoid leaving signed or partially completed checks unattended. Because checks display account details, lost documents can create risks involving unauthorized transactions and identity-related misuse.
When disposing of old checks or banking documents, use a secure method that prevents account information from being easily recovered. Avoid sharing clear photographs of checks through public websites or unsecured messages. For legitimate payment setup, follow your bank’s recommended verification and information-sharing procedures.
Review bank statements and account activity regularly to identify unfamiliar transactions. If a check is lost, stolen, or altered, contact your financial institution promptly for guidance. Banks may provide stop-payment services or additional protective measures depending on the circumstances and applicable account terms.
Conclusion
Understanding the parts of a check makes traditional banking transactions easier to complete and review. Every section, including the payee line, payment amount, signature, routing number, and account number, serves an important purpose. Knowing where these details appear helps account holders avoid common mistakes and maintain accurate financial records.
A properly completed check should contain clear payment instructions, matching numerical and written amounts, and an authorized signature. The printed banking information supports processing, while the memo and check number help with recordkeeping. Reviewing each section before submitting a payment can reduce confusion and unnecessary delays.
Although electronic payments are widely used, paper checks remain relevant for certain personal and business transactions. Learning how to read and write checks is therefore a useful financial skill. With careful handling, accurate information, and appropriate security practices, you can use checks more confidently and responsibly.
Frequently Asked Questions
What Are the 12 Parts of a Check?
Common check components include the account holder’s name, bank name, date, payee line, numerical amount, written amount, memo line, signature, routing number, account number, check number, and endorsement area. Layouts may vary by bank.
Where Is the Routing Number on a Check?
The routing number is usually a nine-digit number near the bottom-left corner of a U.S. check. It identifies the financial institution and helps direct eligible payment transactions through banking systems.
What Is the Difference Between an Account Number and a Check Number?
The account number identifies the checking account associated with the payment. The check number identifies a specific check within a payment series, helping account holders track and reconcile individual transactions.
What Happens If the Written and Numerical Amounts Do Not Match?
A discrepancy may cause processing delays or other problems. Applicable rules may give priority to the written amount, but the safest approach is to correct the check before submitting it.
Is It Safe to Share a Picture of a Check?
Sharing a check photograph can expose account numbers, routing information, and personal details. Avoid posting check images publicly, and only provide banking information through secure channels when legitimately required.